
There is no limit to when you want to merge two blog posts. There are gazillion reasons to do so. Maybe you want to merge it for your new upcoming website or stalled traffic. No matter what the reason is to merge the posts, you’d definitely not want to lose your rankings in the search engines.
The good news is that you can easily collaborate WordPress blogs into one post without any difficulties. This article will show you how you can merge your blog posts without affecting your SEO.
The first question that’ll rather pop out for a noob would be: Why should you merge two blog posts into one? Do you have the same question in your head? Without further ado, let’s get started.
Table of Contents
The Need to Merge Two WordPress Blogs
Combining two WordPress blogs simply entails copying the content or data from one and pasting it into the other to create a massive blog post. Well, that appears to be straightforward, doesn’t it? Believe me, it gets much easier if you put it into practice.
Some of the advantages of integrating two blog entries into one are as follows:
- It’s a lot easier and less complicated to run one WordPress blog than manage two.
- Having a single WordPress blog will also help you greatly improve your content library.
Now let’s look at how you can combine all of your blogs into one. All you have to do now is follow the easy steps I’ve provided in this article, and you’ll be able to integrate your posts into one.
How to Merge Two Blog Posts?
Before continuing further, you should back up both of your WordPress sites, especially the one that will be receiving your new content. If something goes wrong during the process, you can restart from the beginning.
Before proceeding, double-check that each of your sites has the same permalink structure. Otherwise, the merger will be impossible to complete without affecting your SEO results.
Step 1: Export WordPress Content as an XML File
The beauty of WordPress is that it has a built-in feature for exporting all of your content, including images or even custom post types. Since you wish to unite two websites, you want to incorporate everything available. Right?
Simply go to the WordPress dashboard of your blog, say blog A, to accomplish this. Then navigate to Tools and select Export. Select all the content and then click the Download Export File button.

The Extensible Markup Language(XML) file will be triggered as a result of this. This is where you’ll discover all of your content, as well as its structure.
Step 2: Import the Content to Your New Blog
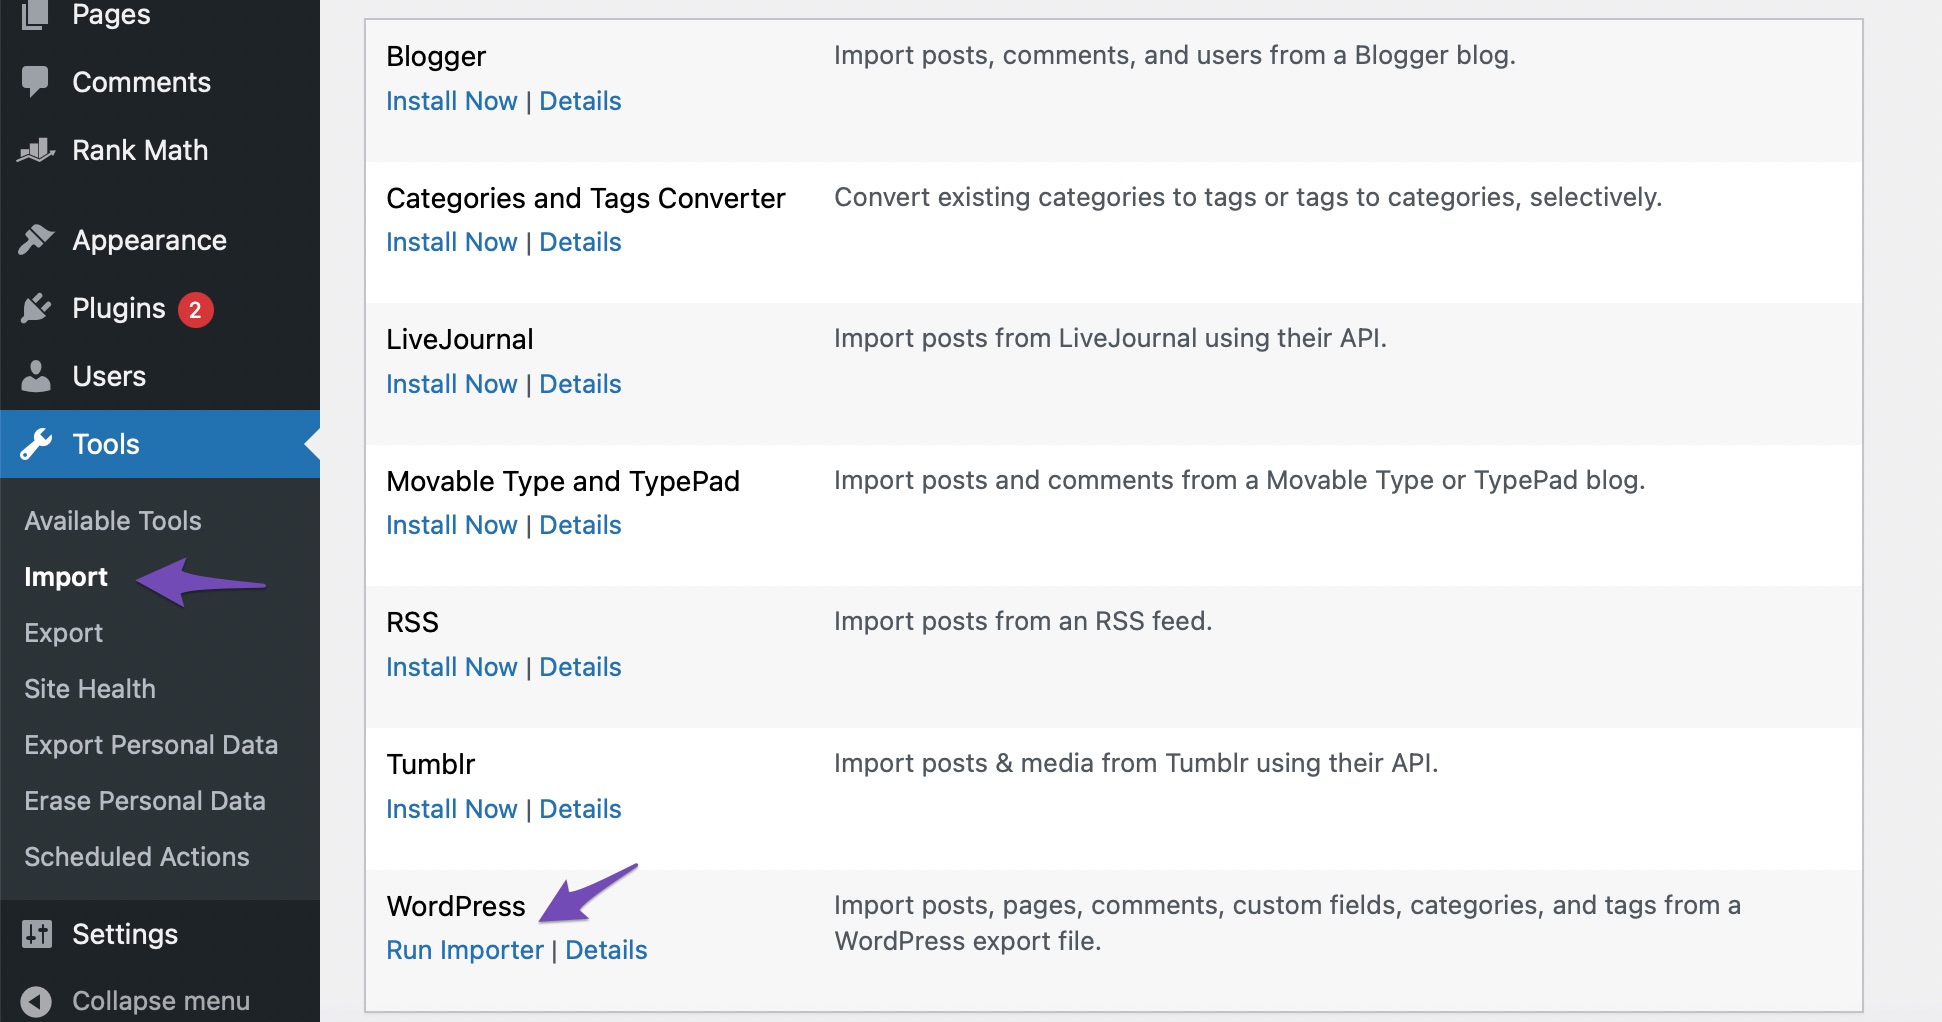
Another important feature of WordPress is the import function. To import your content to your blog, go to Blog B’s dashboard, and navigate to the Tools section and the Import tab. Simply scroll down to the WordPress option and select Install Now.
Sit back and wait for WordPress to finish setting it up for you. When it’s finished, the Install Now link will be automatically replaced by Run Importer, as shown below:
You will then be navigated to a new page where you’ll be asked to upload an XML file to start the uploading process. You simply need to select the file you downloaded in step1 and click the blue Upload file and import button.
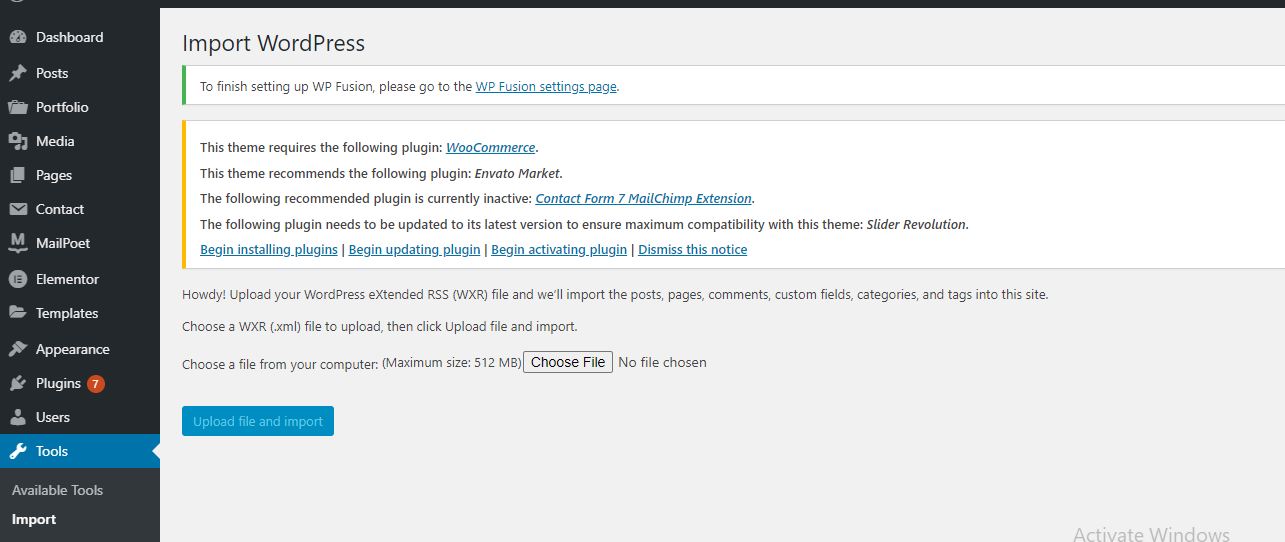
This can be a time-consuming process depending on how much it has to import. Once done, you will be redirected to a new page which in turn brings Step3.
Step 3: Assign Your Imported Content To Your User
WordPress will ask you if you wish to keep or replace the original writers for your imported content at this point. This means you have the option of delegating all of your ‘new’ elements to an existing user on your website or creating a new one just for that reason.
To assign authors, go to the AssignAuthors prompt. After the import is complete, select the option you want and provide the username if necessary.
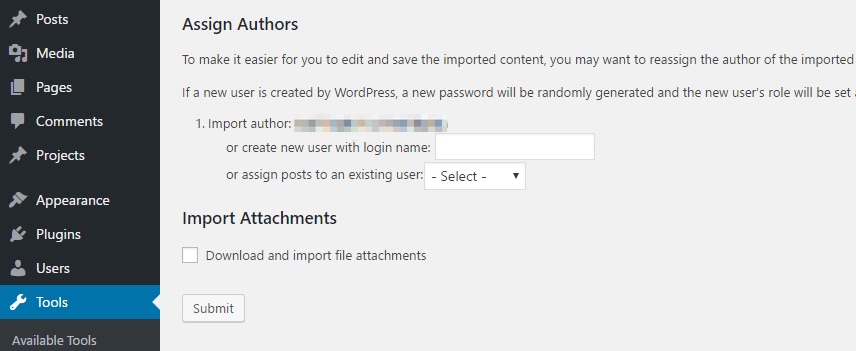
Also, there is an option to import your attachments below the AuthorAssign section. Check the tick box before clicking on the submit button, and you’re all set.
Step 4: URL Redirects
Now that you’ve successfully imported all of your former blog’s material, you’ll need to figure out what to do with it. Leaving it would divert future traffic away from your current website.
Taking it offline right once, on the other hand, isn’t an option because you’d lose all of the SEO benefits you’ve earned over time. In this case, the best approach is to set up a site-wide redirect, which will send everybody who visits Blog A to Blog B.
Step 5: Import the Images
We are aware that importing images rather than content is a time-consuming procedure. But you need not worry. I’m here to show you how to quickly and effectively you can import your images.
You should indeed download all of the media files from Blog A via FTP. Look for them under the wp-content/uploads folder.
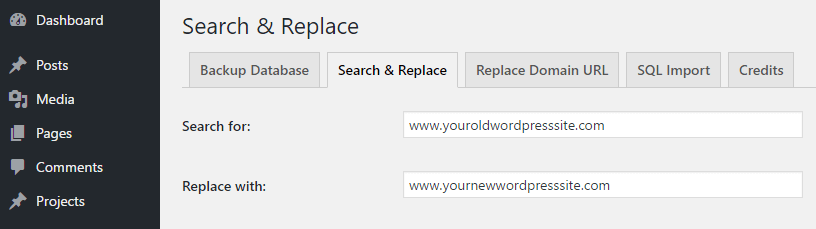
After that, you must upload them to Blog B in the same directory. Now, use the Search and Replace Plugin to extract all of the links that point to Blog A.
All you have to do now is install and activate the plugin. On the dashboard of Blog B, navigate to Tools > Search and Replace. Check out the Search for and Replace with fields under the Search and Replace tab. Incorporate the URL of Blog A in the former and Blog B’s in the latter one.
Now it’s time to grab a coffee. The plugin will do its work and once done your merger will be completed.
What to Do If the Blog Posts Don’t Merge Correctly?
So far, I’ve outlined all of the processes that will assist you in successfully combining the blogs. However, there is always that one something that goes wrong when you least expect it.
First and foremost, if your new site has any major faults, you may be able to restore it to its previous state by utilising the backup you prepared earlier. However, if you’re experiencing a minor issue (such as your imported images not appearing correctly), there’s no need to restore it. The main issue is most likely the form that was used with the Search & Replace plugin. To fix this, simply use the plugin to restore your site and identify the error.
Finally, depending on how many categories and tags you have on Blog A, you may end up with a jumble on Blog B — in other words, you may have too many entries or duplicates to sort through. In such a scenario, you simply need to merge some of them.
Conclusion
The job of merging two websites might initially seem tedious, but it is a straightforward process. It is just a matter of time to merge your two websites without your SEO rankings being affected.
I have enlisted these 5 simple steps for you to carry on the merging job very smoothly. If you have any queries regarding the merging of blog posts, please let me know in the comments section. I’d be happy to hear from you.